

Field-based biomechanics is a term I coined to explain how to see motion in real time and use this information to build exercises, correct movement, and load movement well without needing to slow down a session with instruction or video analysis.
The ability to see motion as it happens is a skill seasoned coaches and therapists gain over the years in the industry. This view of movement helps them wow clients and gives them confidence in their programming.
I teach a shortcut to learning this skill. Many top coaches are not even 100% sure how they acquired those skills.
The key is to better describe how a movement occurs. This video and eBook are designed to help you do that yourself.
Bones through Skin
When observing motion, you will primarily see bones move via the skin. This means that you will be able to make observations using a combination of what you see and what you can predict is happening.
Muscles are trickier. Some people draw muscles on skin, but the problem with that is that the skin doesn’t move nearly accurately enough to make that work.
Biomechanics
There are two parts to biomechanics –
Kinematics – Describing the motion of the body, regardless of the forces acting on it
Kinetics – Describing forces associated with the body in movement
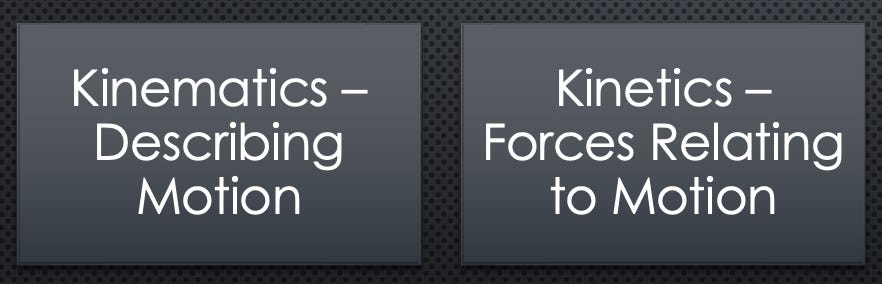
My primary concern with field-based Biomechanics is the Kinematics of the situation. The movement of the bones is going to be key to the other parts of the course.
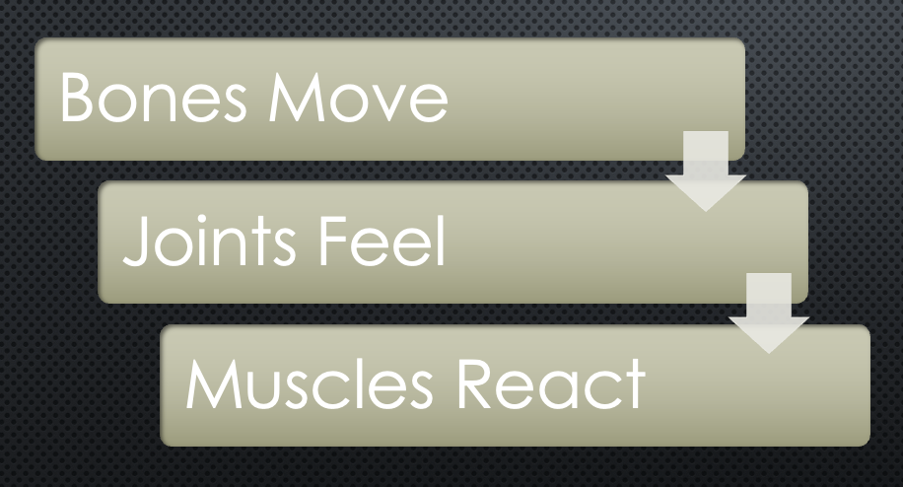
It is important to understand that when we observe motion, it is usually after the reasons for the movement have passed. So in the chart above, we are looking at Bones Moving, knowing that the reason for that movement might be our muscles reacting to a real or a perceived situation.
Once a bone is in motion, we will try to describe it. The nuance in the description will ultimately lead to you, as a trainer, designing specific, highly transferable, and quality exercises.
We call the change in forces in the gap between two bones in a series joint feelings, where the joint experiences a change in pressure due to bone motion.
The change in pressure at the joint will help indicate which muscles will react to that change. Observing the muscles reacting by observing them as they initially lengthen helps give a more functional view of the movement.
Bones Move
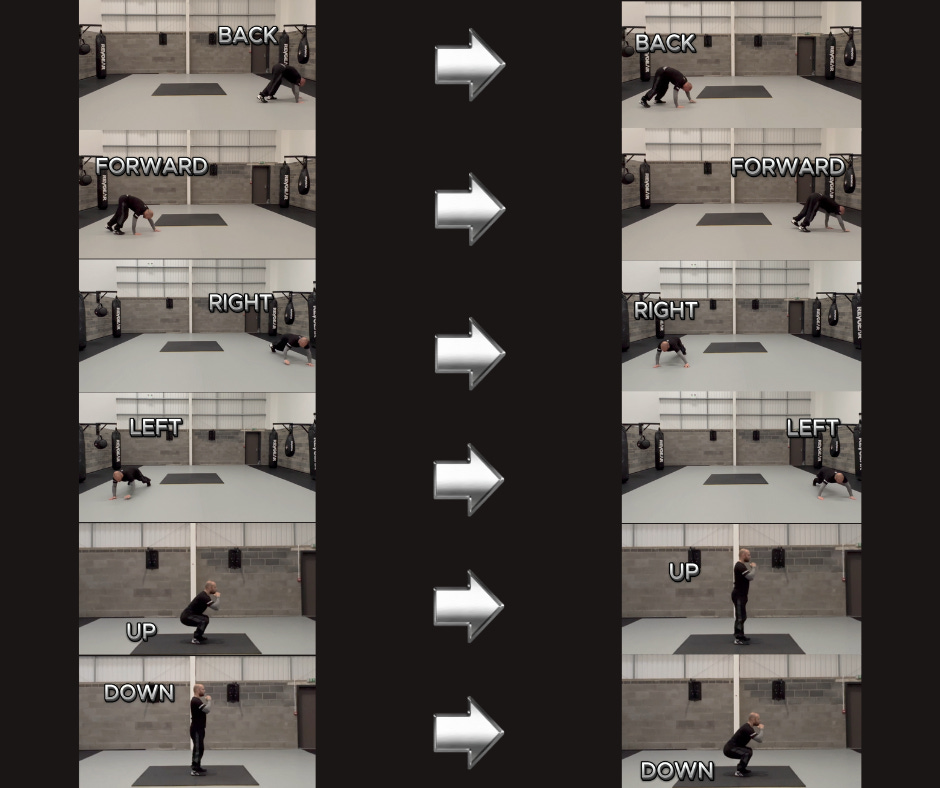
When talking about bone motion, we are talking about where a bone moves in space compared to where it started, which means we will have three binary questions to ask.
Did the bone travel down or up
Relative to the person, did the bones travel left or right?
Or did the bones move backwards or forward?
The next question revolves around the bones turning on an axis (pun intended), so we have three planes to ask questions about. In the sagittal plane, then the question is,
Did the bone move Anterior or Posterior?
In the frontal plane, the question is about tilting. Did the bone tilt right or left? (In journals, this would be called lateral flexion; I changed it to reduce confusion.)
And finally, right or left rotating,
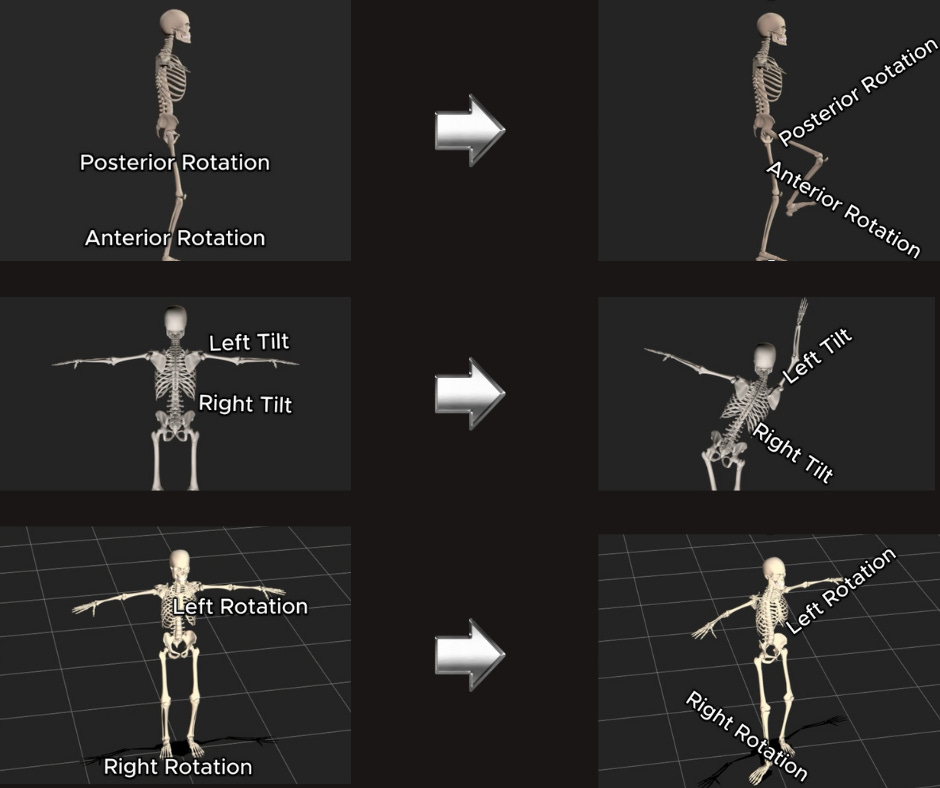
You can see movement more clearly once you have described bones like this. That clarity will lead you to know exactly what is going on in a movement at the joints.
Joints Feel
Does a joint exist, or is it merely the meeting place of two bones? I mean it does exist as it has connective tissue and fluid, but in this case, it is just the bit between two bones, where one side stretches and the other gets squished, depending on how the bones move. The change in pressure in the gap between the bones is labelled in the industry as Flexion, Extension, Abduction, Adduction, etc.
When you look at movement, you are interested in the change in pressure rather than the position of the joint. For example, we do not care if we see Abduction; we care how the joint became abducted. So, we would look for abducting or adducting to take place to see that final position.
As we know the bones, we can describe how a joint got to its current position with better accuracy than most people. This means we can describe which one of the five possible bone motion combinations caused the motion and change in pressure.
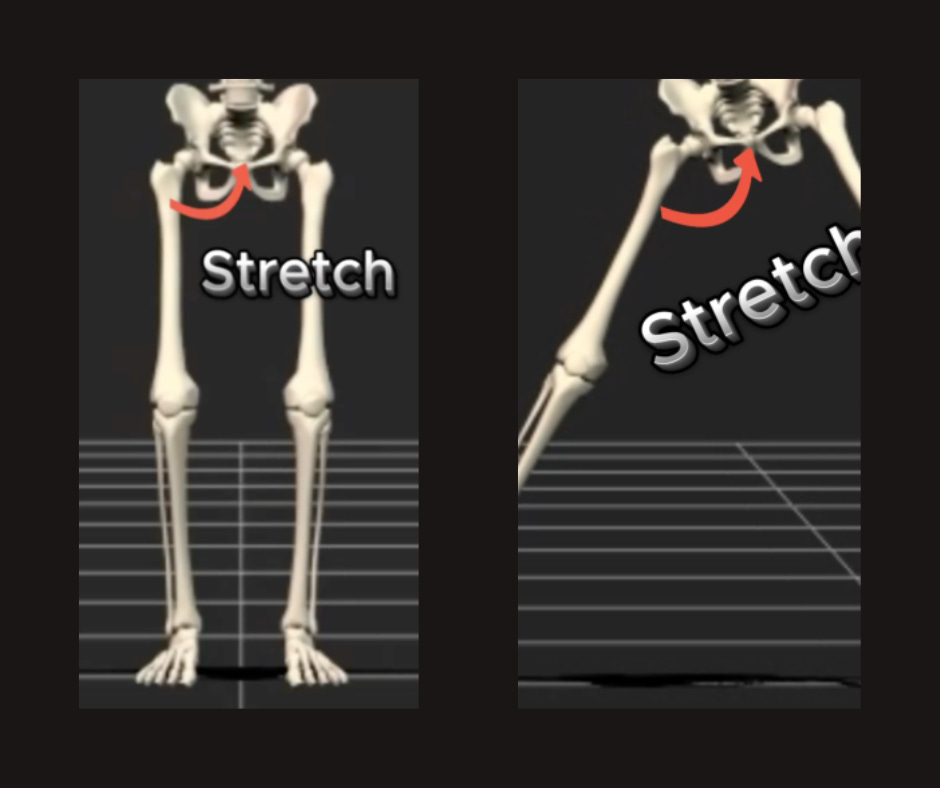
In the following, two images show our skeleton's right hip going through abduction. The motion occurred because the pelvis moved up and left while tilting right, and the femur travelled up and left while tilting left. It means the joint has felt abducting due to bones travelling in opposite directions.
(The images do not do this justice, and you are better off watching this in the video)
If you are trying to observe the reasons a client moves the way they do and then build an exercise that either directly replicates (for performance) or purposefully does not replicate a movement (to avoid pain initially), then having an accurate description as to how the bones created the motion is vital. This will allow you to get the exact response you want from the muscles you aim for with exercise.
Joints do not move in just one plane of motion; they move in three planes simultaneously, even when the motion seems to show just one plane of motion clearly.
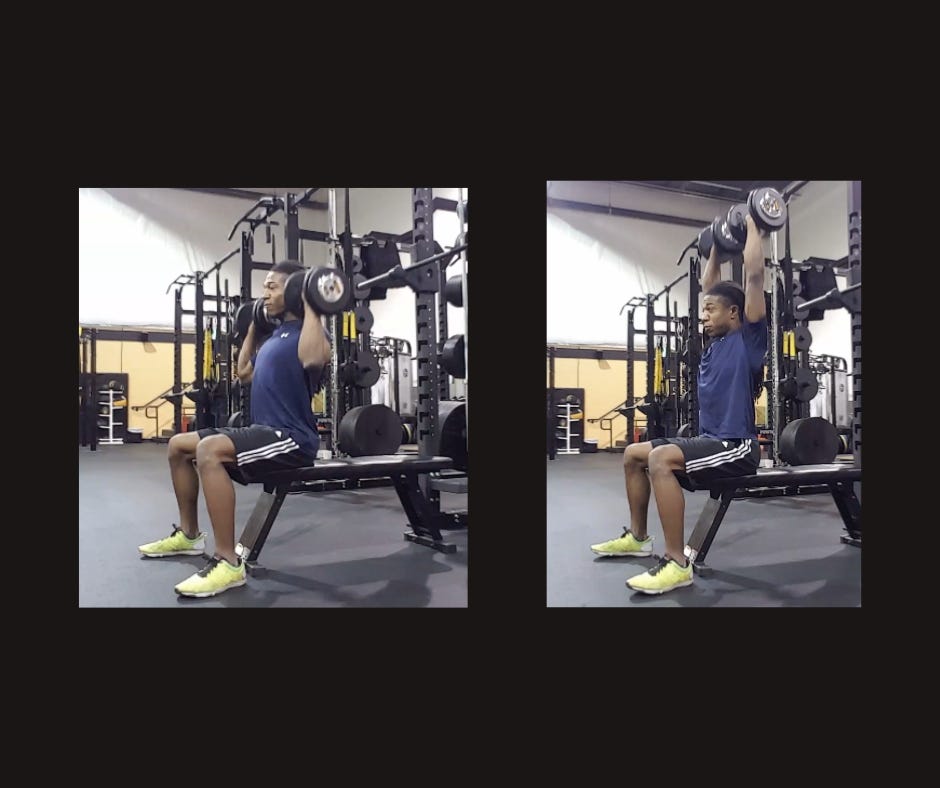
In the exercise below, a simple seated shoulder press, it would be reasonable to say that the moving bone was the humerus and the motion it is going through is a left tilt (on the left arm, which is nearest us in the photo). However that is not true, in fact, the bone (look at the elbow position), also travels forward so causes a slight posterior tilt of the humerus, and because this does not send the dumbbells backward, then there is a slight right rotation of the humerus too.
It means we see shoulder abduction as the main concentric movement at the shoulder, when in fact it is actually flexing, abducting and internally rotating. Even though most of the motion is abducting, this detail about the movement can affect how you expect the rest of the body to react to the press.
At the shoulder, there are 8 combinations of movement that could occur. All of them have variations of which plane or planes are most dominant in the movement. All these different possibilities would lead to different muscles being activated, depending on how the movement was loaded. I termed that the BIG 8, which happens at every joint (except in the foot and ankle, which is a bit different).
Muscles React – Except when they are proactive
Force is produced from the eventual body part due to one or a combination of the following four reasons,
Chemical
Elastic Energy
Gravitational Potential Energy
Kinetic Motion
Chemical energy is most likely used proactively to produce motion or to continue producing force against a relatively slow-moving object. It is the power caused by the attempted shortening of the sarcomere, enabled by ATP.
Elastic Energy, meanwhile, is mainly utilised when a movement is reactive. It is the stretch of the tissue, muscle, and connective tissue, providing an equal and opposite motion to the one it experienced for whatever reason. Often, this system is challenged in training through plyometrics.
Gravitational Energy is power generated due to gravitational pull. It is usually controlled by elastic and chemical energy, for example, when a client moves from standing to a squat position.
Kinetic Energy is the power acquired by the moving object, such as the fist in a punch or, if the hand is holding something, the something else.
The above is more about Kinetics, something I will go into more detail in a later lecture.
Faster’s 5 Skills – Templates to Work from
Technically, there are six skills, but I put two very similar skills together. These are essentially just common sequences that happen when observing a certain movement characteristic. I have named them,
· Vertical Displacement Down
· Rapid Change of Direction
· Locomotion
· Reach
· Training In-Tension
These skills have come from my years in the industry working on sports performance, and so they can be challenged, should be changed as you observe clients and should be used as I intended, to show the template of a movement.
Vertical Displacement Down
This is literally a squat; it just describes any movement where the sequence of bones must be such that a majority of the joints used in the motion are taking to a flexed position and back out.
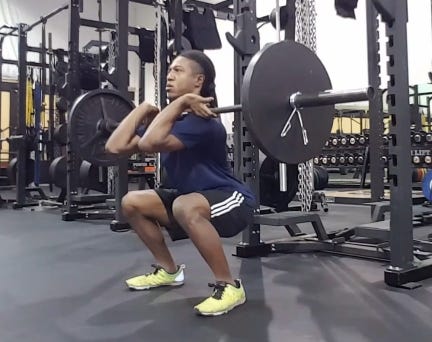
I chose front squat because for this to be successful, you need to be able to see,
Dorsiflexion at the midfoot and ankle joints, flexion at the knee, hip, shoulder and elbow.
Rapid Change of Direction
To produce force fast, whether this be a kick, throw, punch, or turn, the pelvis needs to be projected in that direction while the final limb is traveling in the opposite direction. The resultant stretch drives elastic energy and causes a huge amount of power to be produced. In the photo below, you can see this being lined up for a throwing motion for football.

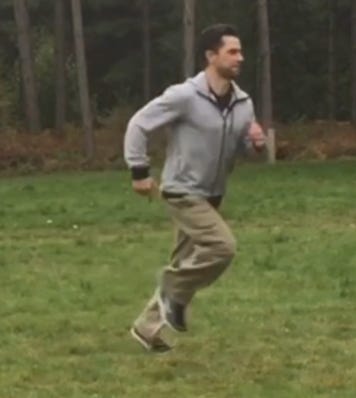
Locomotion
To locomote, you need to skip or glide across the floor. It often requires the limb or limbs in the air to provide the forward motion, and in the case of running, trigger a response in the rear limb on the floor to rapidly hit the floor and get dragged through. These motions are reactions (reflexes) rather than conscious effort. It means in a good locomotion pattern, once you are moving, you do not feel like you are pushing off.
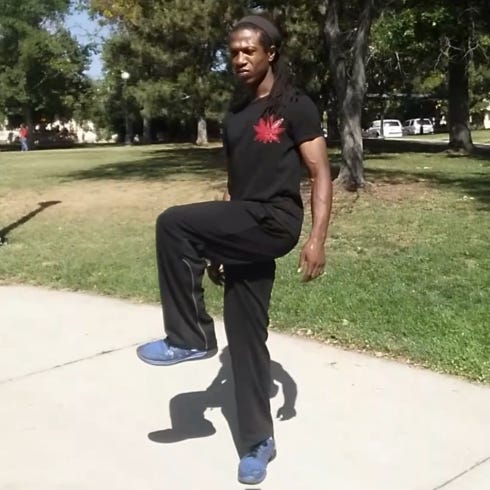
Reach
In slow and controlled movements, which we call a reach, it is likely that the sequence of the bones in the movement occurs one after another in order. These are the movements I often use to teach how to see movement, because they are easy to predict. You see a ripple effect from the body part that moves first. The only time this rule might change is if the client’s centre of gravity is challenged so much that there is a reaction in the muscles to give a proactive correction and prevent falling, which is not a bad thing. Below we see a rotating across-body reach from the knee.
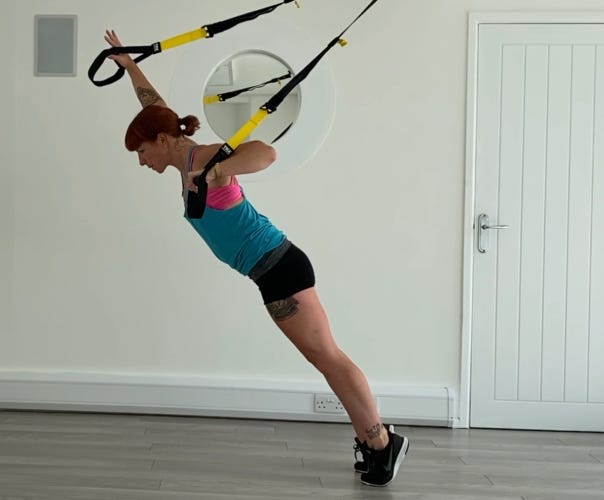
Training In-Tension
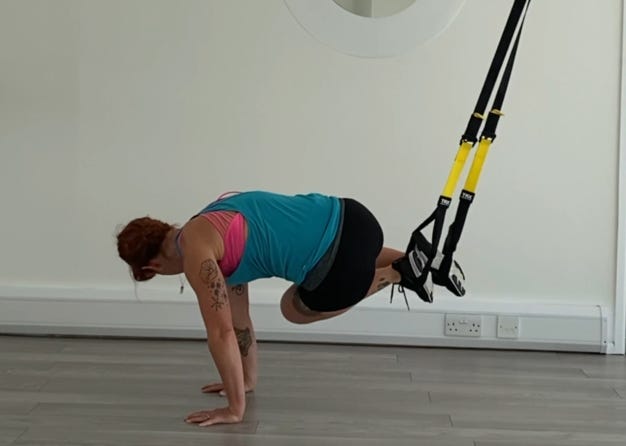
Training In-Tension is two types of skills that share the same trait; the goal is to prevent motion at one or more joints, while allowing other body parts to move. These two different movements are shown below. First, we see limbs moving and the torso still,
In the second one, we see the limbs (shoulders) still and the torso and the rest of the body moving.
It is important to note that these skills will usually be combined for movement. For example, in a 100M sprint, you would require vertical displacement down to get into the blocks, rapid change of direction to get out of the blocks, locomotion to travel, with training in-tension torso still to keep the run efficient.
Kinetics – Rule the Tool
Further into the course, or if you are reading this on Substack, at a later date, I intend to review movements under load and how these loads differ. It will help you to be the one who uses the training tool to complement the exercise you built, rather than relying on the instruction manual. I coined this Rule the Tool, a cool name I let my friend Adam Wolf use in his book!
If you are interested in learning more about this, the best way is to send me a WhatsApp, and I can discuss the best course for your budget and why you want these skills. The company WhatsApp is 07761996986. I look forward to hearing from you.
